One of the easiest ways to get your station up and broadcasting is by using the Edcast Standalone Application. Once installed on your computer you won't need any other software to play live over the internet. You simply play the music, audio files or even talk live and whatever is played on your computer is what your audience is hearing, it's as simple as that.
1) Download and Install Edcast Standalone
Go to your Control Panel and choose the Downloads tab, Download and Install Edcast Standalone.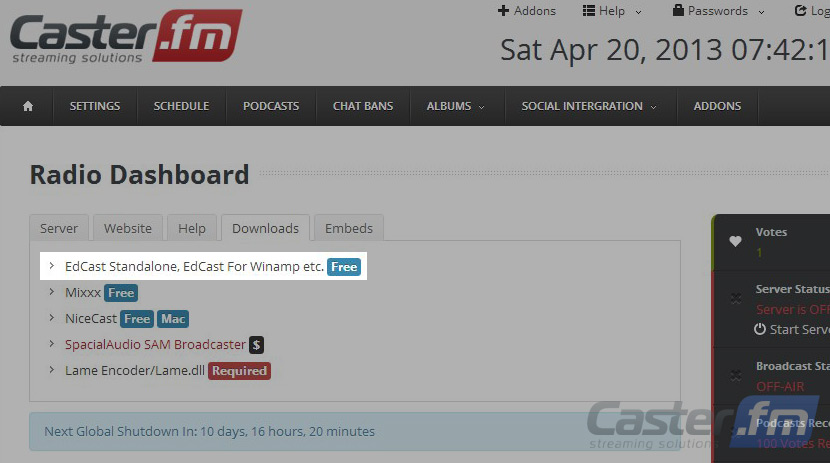
2) Follow the simple step by step instructions which are on your screen. When you reach the 'components to install' page, it is critical that you have the box labeled 'LAME encoder dll(for MP3 encoding) checked. This will allow you to play your MP3s through the Standalone App. *MP3's are one of the most common audio file formats.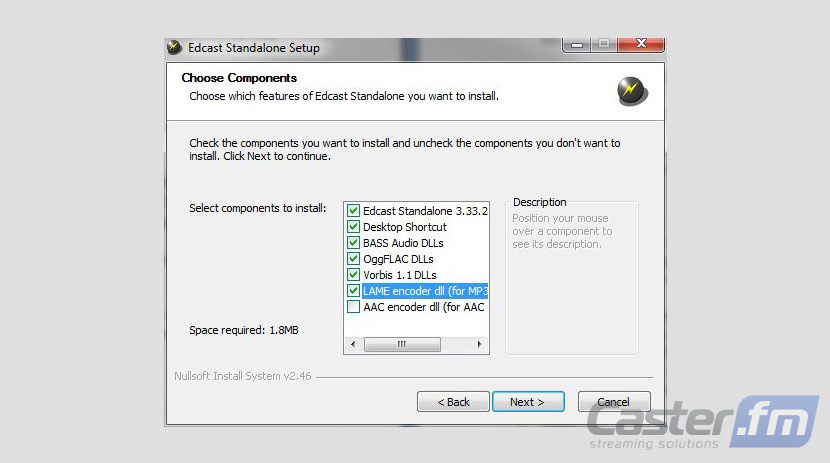
3) Download the MP3 Lame Encoder
Near the end of the installation process you will get a message box telling you that you need to download a file called, “Lame_enc.dll” into the program directory (normally C:\program files\Edcast\). Choose YES. You can also perform this step manually by downloading the file from your control panel and placing it in your program directory if you wish. 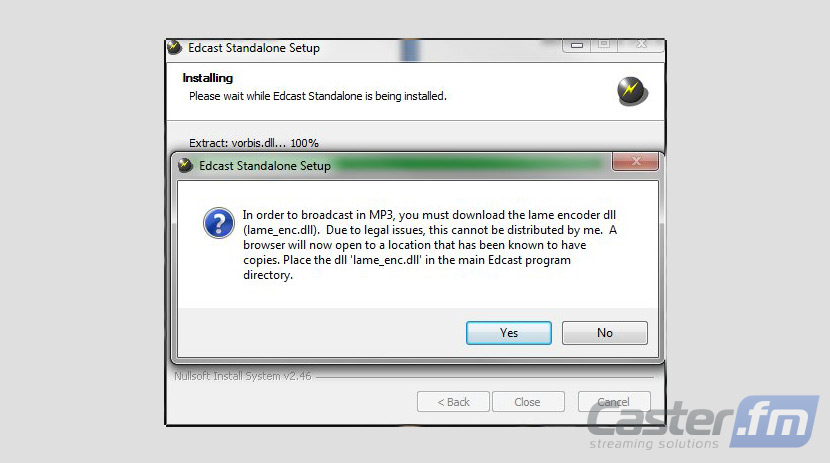
4) Place the lame encoder dll (lame_enc.dll) in the Edcast program directory.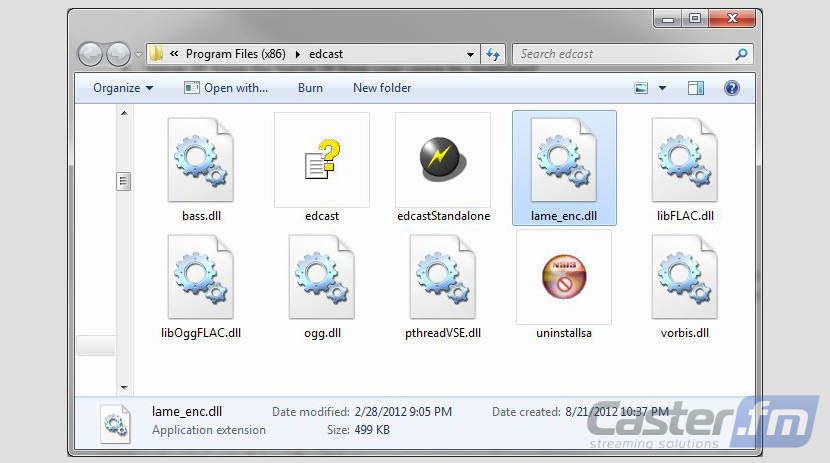
Once you've completed the installation process you'll be ready to prepare your station for live broadcasting. Following these quick steps will have you broadcasting in just minutes.
5) Go to your Caster.FM control panel and log in securely.
6) Click the button labeled “Start Server”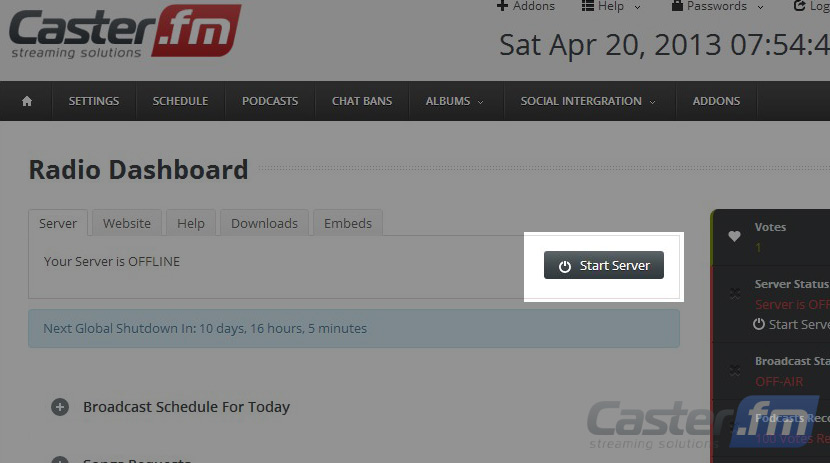
This will initialize your server and display a page which looks like this: 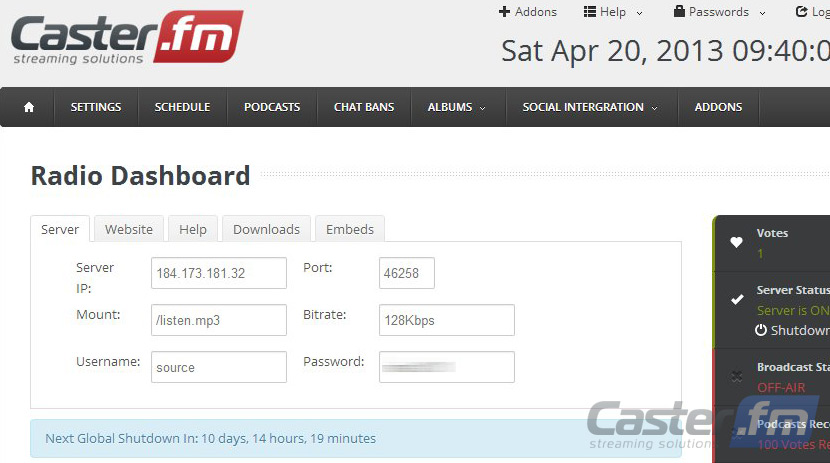 This is the information you'll need about your server to connect it to the Edcast Standalone Application.
7) start up your Edcast Standalone Application on your computer. Locate and click on the “Add Encoder” button. 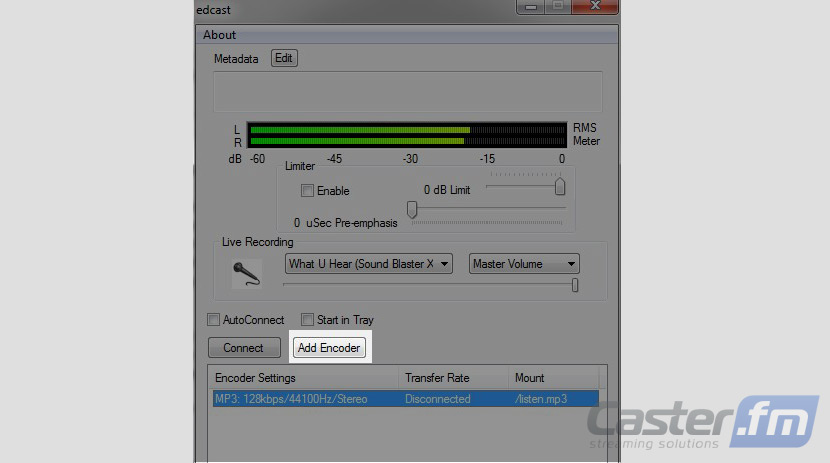
8) Right click on the new encoder which is created and choose 'configure'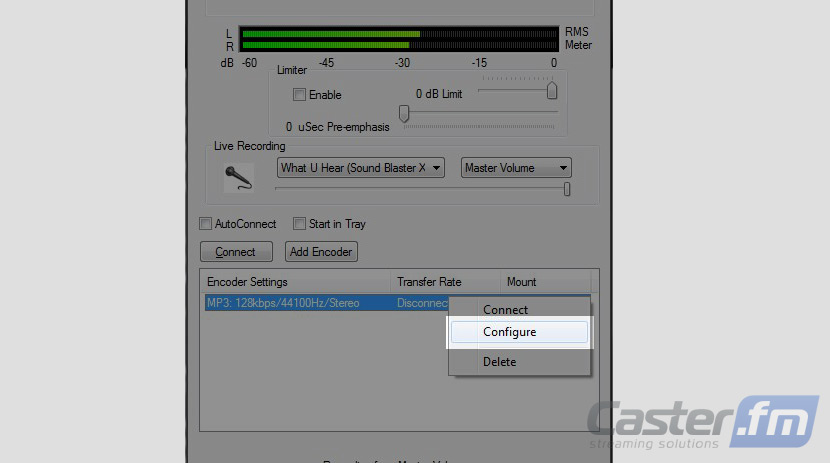
This is one of the most important steps as it is where you are configuring your broadcasting settings. While these settings can be changed quickly and easily down the road, it is best to take your time and choose the right options now.
9) Fill in the settings as follows:
• Encoder Type: MP3 Lame
• Bitrate: 128 Kbps or 64 Kbps
• Samplerate: 44000. This is the standard setting for most users.
• Channels: 2 – 1 channel is for a mono broadcast, 2 is for stereo.
• Server Type: Icecast2
• Server IP: Enter the Server IP from your caster.fm dashboard
• Server Port: Enter the Server Port from your caster.fm dashboard
• Encoder Password: Enter the Encoder password from your caster.fm dashboard
• Mount Point: /listen.mp3
• Reconnect: 10 – This is an optional setting which will allow the Edcast Application to reconnection if it is disrupted.
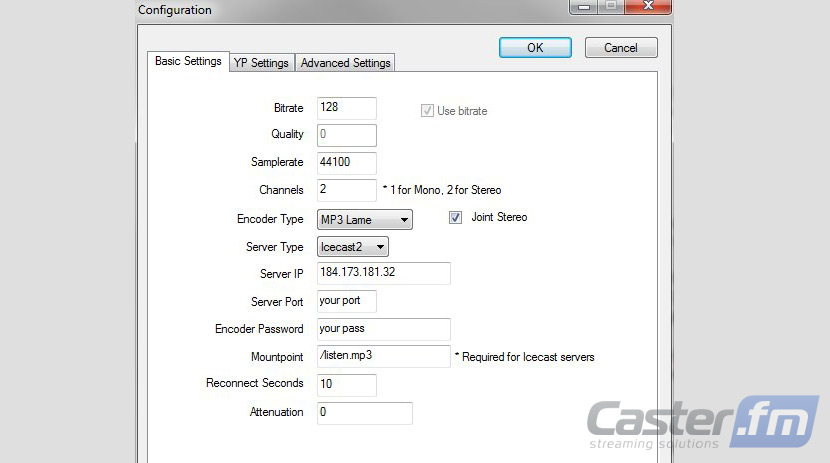
9) Once you hit OK your settings are saved and you're ready to start broadcasting live!
simply click connect and you're ready to go!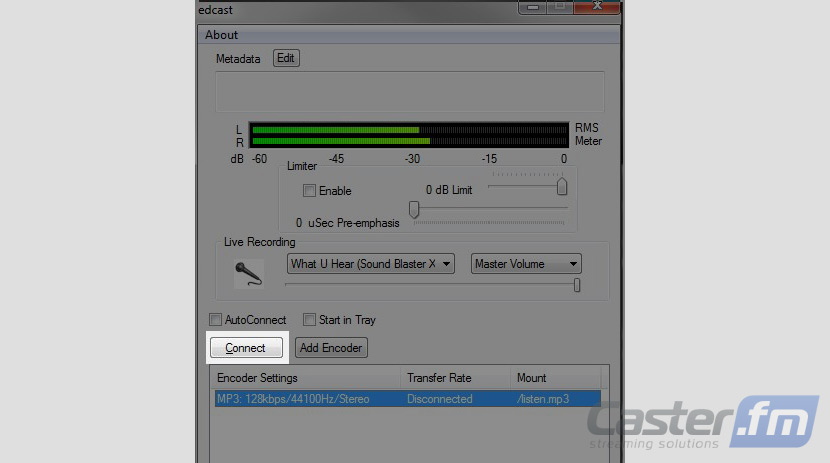
Important Note
If your computer has more than one sound card you need to select the desired sound card and output. The Edcast Standalone App streams from only the sound card and output you select. In most computers the 'stereo mix' is the correct option to choose.
